Christmas in July!

Welcome to our Saturday Blog Hop at Create With Connie & Mary! We have some Christmas projects for you this week for Christmas in July! It’s never too early to start creating Christmas cards. Christmas is only a little over 5 months away!
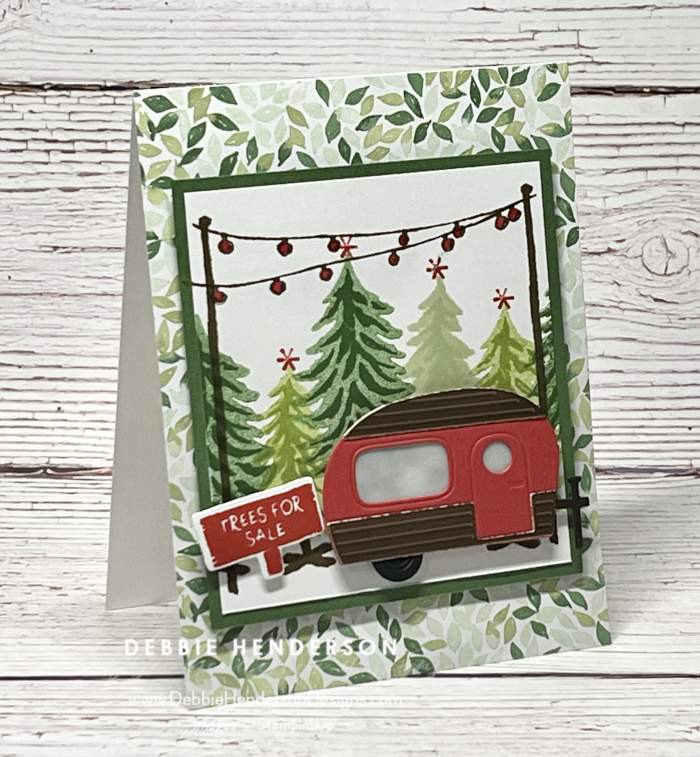
I’m using some new products from our Mini Catalog today. I just LOVE the little camper die. It’s from the Tree Lot Dies that you can earn for free during Sale-A-Bration from July to August.

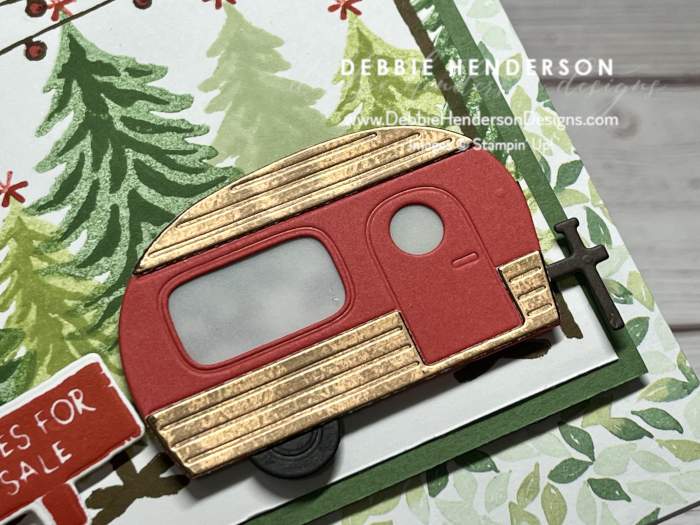
Another thing that is neat about the Tree Lots Dies is it coordinates with our Trees For Sale stamp set. I layered some copper on the camper using the Brushed Metallic Cardstock. How fun is this little scenery?


Here’s the Card Recipe:
- Card Base: Thick Basic White Cardstock 11″ x 4-1/4″. Score and fold at 5-1/2″.
- Layer #2: Painted Christmas Designer Paper 5-1/2″ x 4-1/4″. Glue to card front.
- Layer #3: Garden Green Cardstock 4″ x 3-3/4″. Glue to card front using Stampin’ Dimensionals.
- Layer #4: Basic White Cardstock 3-3/4″ x 3-1/2″. Follow these steps:
- Add stamped trees in different sizes using Garden Green, Old Olive and Soft Sea Foam Inks. When stamping the bolder image first, ink the stamp and stamp on scrap paper. Without reinking, stamp on the white layer. Add the detail of each tree with the same color ink and it will show up darker.
- Stamp stars to each tree by inking up one snowflake only on the snowflake cluster image using Poppy Parade Ink.
- Stamp the two poles on each side about 1/4″ from the edge using Early Espresso Ink.
- Stamp the lights garland twice using Early Espresso Ink.
- Color the lights using the Poppy Parade Stampin’ Blends Markers
- Glue to Garden Green layer.
- Camper: Follow these steps for the camper using the dies:
- Cut (1) camper using Poppy Parade Cardstock. Cut off the tire and the hitch using Paper Snips. Set aside.
- Cut (1) camper using a 1″ strip of Basic Black Cardstock. Cut only the bottom of the camper to include the tire and the hitch. Glue to the backside of the Poppy Parade layer.
- Cut (1) using the camper detail die with Brushed Metallics Cardstock. Glue to the top and bottom of the camper.
- Cut a small piece of Vellum Cardstock to fit on the back side of the camper to cover the two windows. Glue in place.
- Glue camper to the white layer at the right using Stampin’ Dimensionals.
- Sign: Stamp the sign on Basic White Cardstock using Poppy Parade Ink. Cut with the die and glue to the left of the camper using Stampin’ Dimensionals.
Products Used:
- Stamps: Trees For Sale
- Cardstock: Garden Green, Poppy Parade, Basic White, Basic Black, Thick Basic White, Brushed Metallics
- Designer Paper: Painted Christmas
- Inks: Garden Green, Old Olive, Soft Sea Foam, Poppy Parade, Early Espresso, Poppy Parade Stampin’ Blends Markers
- Tools & Accessories: Tree Lot Dies, Stampin’ Dimensionals
Now you can follow the rest of the Saturday Blog Hop by clicking on the links below to visit my talented teammates! Click PREVIOUS to visit Libby and NEXT to visit Melissa:


Leave a Reply