Watercolored Ice Cream Swirl!

Welcome to our Create With Stamping Friends Inspiration Monday challenges. This week’s inspiration challenge is this photo:

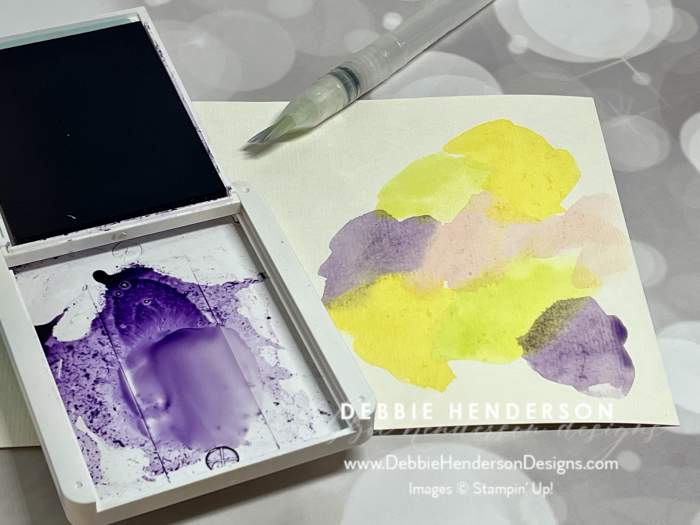
Doesn’t that ice cream look yummy? I also love the colors and tried to capture that in my ice cream as well. I’ll show you how I achieved this. I used our Fluid 100 Watercolor Paper for the ice cream layer:
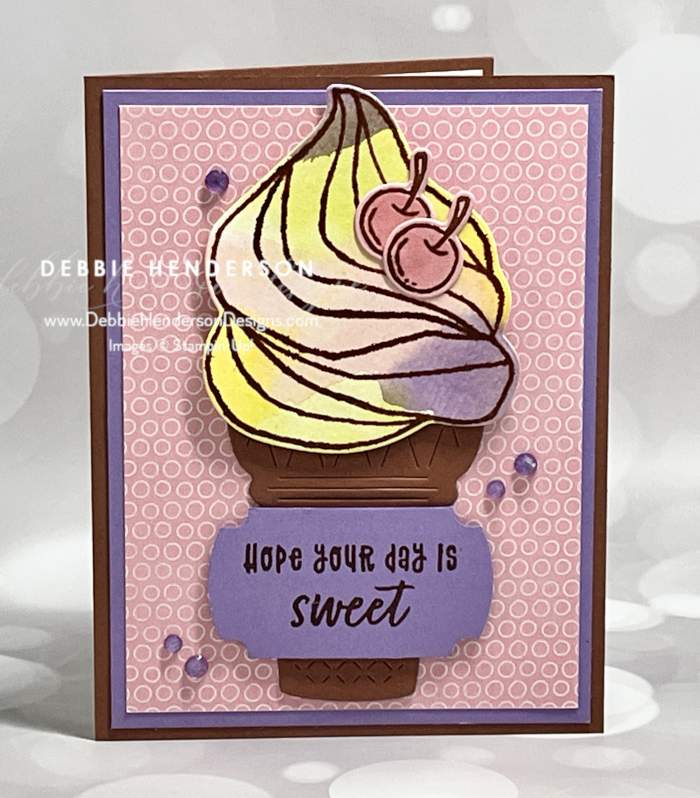
Stampin’ Up! Products Used:
- Stamps: Ice Cream Swirl
- Inks: Highland Heather, Lemon Lolly, Lemon Lime Twist, Pretty In Pink
- Cardstock: Copper Clay, Highland Heather, Pretty In Pink, Fluid 100 Watercolor Paper
- Designer Paper: 202-2026 In Color
- Tools & Accessories: Ice Cream Swirl Dies, Purple Fine Shimmer Gems, Water Painter, Labeled With Love Punch, Stampin’ Dimensionals, Heat Tool, Wink Of Stella Clear Glitter Brush
Card Recipe:
- Card Base: Copper Clay Cardstock 8-1/2 x 5-1/2. Score and fold at 4-1/4.
- Layer 2: Highland Heather Cardstock 5-1/4 x 4. Glue to card base.
- Layer 3: 2024-2026 In Color Designer Paper 5 x 3-3/4. Glue to card front.
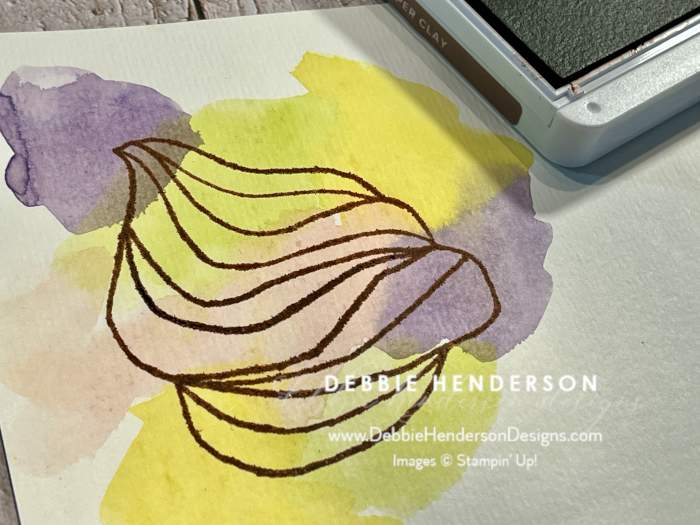
- Layer 4: Fluid 100 Watercolor Paper 5 x 3-3/4. Use the ink from all 4 ink pads with a water painter, to add color in random areas as shown in Photo 1.
- Allow the ink to dry or use a Heat Tool like I did.
- Stamp the ice cream image over the watercoloring with Copper Clay Ink. Cut with the die and set aside.
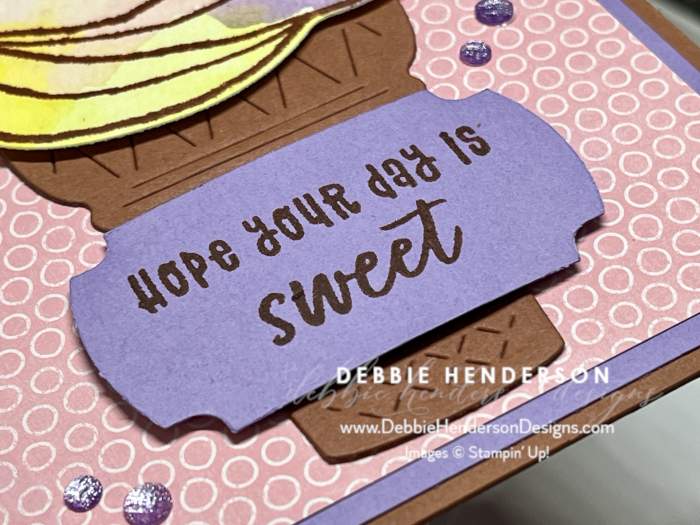
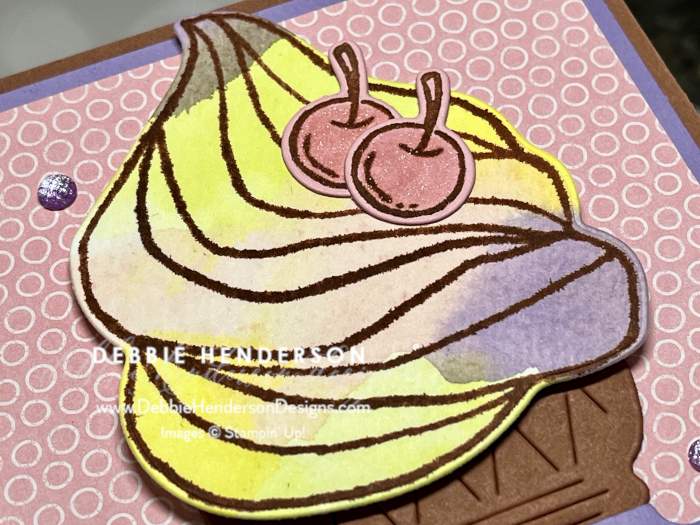
- Use the die to cut one ice cream cone with Copper Clay Cardstock. Glue to card front at the bottom of the designer Paper.
- Stamp the sentiment on Highland Heather Cardstock with Copper Clay Ink. Cut with the punch. Glue over the cone with Stampin’ Dimensionals.
- Glue the ice cream image over the cone with Stampin’ Dimensionals.
- Stamp 2 cherries on Pretty In Pink Cardstock with Copper Clay Ink. Cut with the die and glue to the ice cream. Color with Wink Of Stella Clear Glitter Brush.
- Add Purple Fine Shimmer Gems to the designer paper layer.
Make sure you visit Create With Stamping Friends to see what Connie created for our team this week and see our newest tutorial Collection too:




Leave a Reply