Only 8 days remain to earn this stamp set for FREE!

Sale-A-Bration time is almost over with. You have 8 days remaining to earn free products from our Sale-A-Bration Brochure. You can earn free products with each $50 you order and we also have products you can earn with $100 increments. If you missed the brochure, you can view it here:
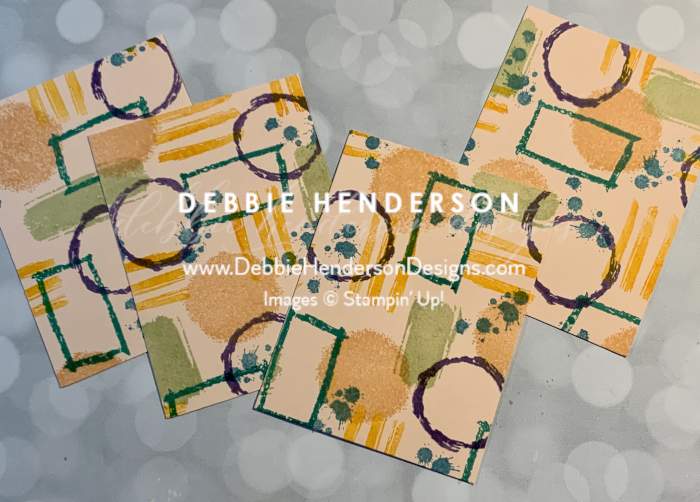
Today I am showing you how I used one sheet of cardstock 11″ x 8-1/2″ and created my own background. Once my whole sheet of cardstock was filled with the Textures & Frames stamped images, I cut my cardstock sheet into four pieces that measure 5″ x 3-3/4″. You can see all four pieces in this photo:

Once I had all four pieces cut out, I got busy creating these four beautiful cards.
You’ll notice they all use the same layers and products:
Card Layers:
- Card Base: 11″ x 4-1/4″. Score and fold at 5-1/2″. Two card bases are used vertically and two are used horizontally.
- Layer #2: Basic White Cardstock 5-1/4″ x 4″. Glue to card bases.
- Layer #3: Petal Pink Cardstock 11″ x 8-1/2″. Fill the cardstock sheet with the images from the Textures & Frames stamp set using the six images and six ink colors. I used Coastal Cabana , Petal Pink, Mango Melody, Soft Sea Foam, Highland Heather and Balmy Blue Inks. Cut cardstock sheet into four pieces that measure 5″ x 3-3/4″. Glue to card fronts.
- Layer #4: Basic White Cardstock cut with the Rectangle Stitched Dies that measure 3-1/2″ x 2-1/4″. Stamp the sentiment on each piece using the Sunny Sentiments stamp set. Glue to card front using Stampin’ Dimensionals.
- Bling: Add a few Silver & Clear Epoxy Essentials to the background of the white layer.
Place a $50 order and you get to choose this stamp set for free:

- Shop Stampin Up! Debbie’s Store
- Watch my YouTube Channel
- Like my Facebook page
- Follow me on Instagram
- Follow me on Pinterest
- Join Paper Pumpkin with me
- Shop the Clearance Rack – up to 60% savings!
- Join my Stamp & Ink Designs Team


Beautiful cards! Such a neat technique!