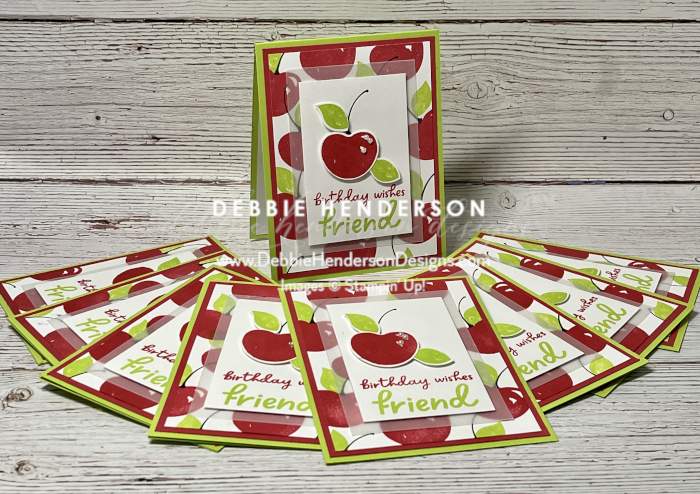
Birthday Wishes Friend Swap Cards!

Hello and welcome to a monthly blog hop by our Stampin’ Up! Demonstrators who earned the annual incentive trip. I hope you will enjoy seeing all of the projects created by demonstrators from all over the world.

For my project, I am showing you a card that I created for a swap I participated in. I used the Sweetest Cherries Bundle which includes the Sweetest Cherries stamp set and Cherries Builder Punch.


You can see how easy it was for me to create my own designer paper layer by repeatedly stamping the cherry image on a Basic White Cardstock layer. You can follow all of these measurements and layers to replicate my card here:
- Card Base: Parakeet Party Cardstock 11″ x 4-1/4″. Score and fold at 5-1/2″.
- Layer #2: Poppy Parade Cardstock 5-1/4″ x 4″. Glue to card base.
- Layer #3: Basic White Cardstock 5″ x 3-3/4″. Stamp the following repeatedly to fill the whole cardstock layer and then glue to card front:
- Cherries: Poppy Parade Ink
- Leaves: Parakeet Party Ink
- Stems: Early Espresso Ink
- Layer #4: Vellum Cardstock 4-1/4″ x 3″. Glue to card front adding adhesive more in the center so the white layer will cover.
- Layer #5: Basic White Cardstock 3-3/4″ x 2-1/2″. Stamp the following:
- Large sentiment at the bottom using Parakeet Party Ink
- Birthday sentiment above that using Poppy Parade Ink
- Cherry stem at the top using Early Espresso Ink
- Glue to card front using Stampin’ Dimensionals.
- Cherry: Stamp the cherry using Poppy Parade Ink and two leaves using Parakeet Party Ink. Cut with the punch and glue to card front using Stampin’ Dimensionals.
- Bling: Add Iridescent Basic Pearl Jewels to the white areas on the cherry.
You can now visit my teammates to see what they have created for the blog hop. You are currently visiting with Debbie Henderson so click on the name below mine here:


Love your cards! so bright and cheery!
Love your Sweetest Cherries cards.